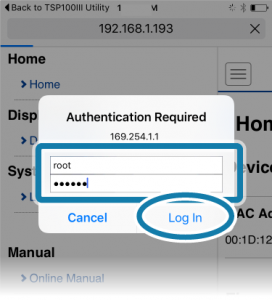
- If you have changed the password, open [Login] from the menu displayed on the left side of the setting screen, or the menu button displayed on the upper left, and login with: Login name: root / password: [Changed password or the default password (public)].

Note
- The default login name and password are as follows:
Login name: root
Password: public
- The following message is displayed when you are using the default password. Select [OK] to change the password or [Cancel] to not change the password.
If [OK] is selected, a screen to change the password will open. After changing the password, return to the following step.
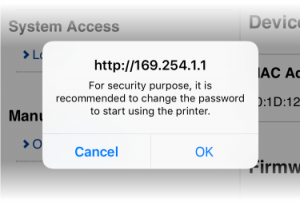
Note
For security purposes, it is recommended to change the password when using the printer.
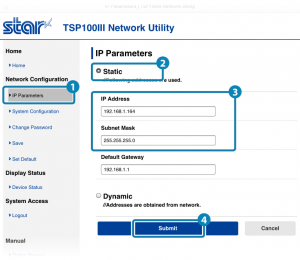
- From the menu displayed on the left side of the setting screen or the menu button displayed on the upper left, open [IP Parameters] 1, select Static 2 and enter the IP Address, Subnet Mask 3, and tap [Submit]4.
Note
Ask your network administrator about the static IP address and subnet mask to use in the settings.
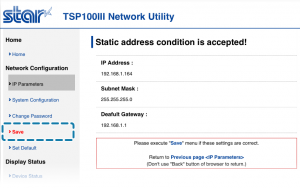
- A screen where you can check and save the entered details will appear.
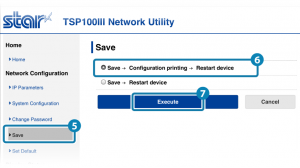
- From the menu or the menu button on the upper left,open [Save] 5, select SaveConfiguration PrintingRestart device 6, and tap [Execute] 7.
The settings are saved to the printer and printed out.