Connecting the printer to the computer via AP network mode includes::
- Print the network configuration and current IP settings.
- Setting up your printer with a fixed IP address
3.1 Print the network configuration and current IP settings
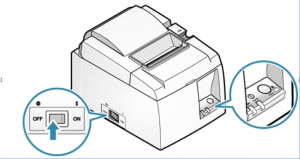
- Press the on / off switch on the left to turn off the printer.
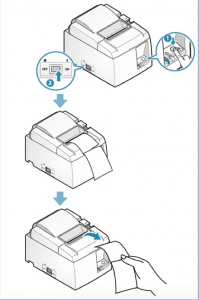
- While the printer is off, press and hold the FEED button on the front of the printer.
- Switch on the printer with the same on / off switch while still pressing the FEED button.
- Release the FEED button when printing of your network configuration and “Current IP Parameters status” report is successful.
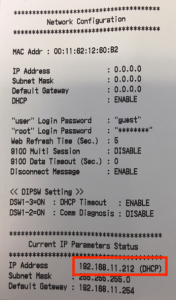
- Under network configuration, pay attention to the SSID. This is the name of your printer.
- Under “Current IP Parameters status”, observe the IP address. This is the default static IP address of your printer.
- Setting up your printer with a fixed IP address
- Enter the dynamic(DHCP) IP address of the printer in the web browser (see on printed ticket: red framed IP address)
- Clickloginin the left menu.
- In the new Authentication window, enter the following:
- Username: root
- Password: public
- ClickOK.
- ClickCancelto close the new security window.
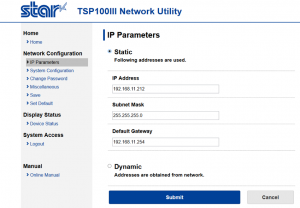
- In the left menu ciick IP parameters.
- Clcik ‘Static’
- Select IP parameters and enter the following:
- IP Address : Fill in as on ticket but is normally already filled in
- Subnet Mask: Fill in as on ticket but is normally already filled in
- Default Gateway: Fill in as on ticket but is normally already filled in
- ClickSubmit.
- Clcik on the Savesectionin the left menu and select the following:
- select Save > Configuration printing > Restart device.
- click Execute.
- Pleasenote: The IP address you find on the automatic printout under “Current IP Parameters status” is the newfixed IP address of your printer.